
2 windows 配置_Zabbix agent 在windows上安装部署
1、下载与解压地址: http://www.zabbix.com/downloads/2.4.4/zabbix_agents_2.4.4.win.zip解压zabbix_agents_2.4.0.win.zipconf目录存放是agent配置文件bin文件存放windows下32位和64位安装程序。2、配置zabbix agent.win.conf找到conf下的配置文件 zabbix_agent
1、下载与解压
地址: http://www.zabbix.com/downloads/2.4.4/zabbix_agents_2.4.4.win.zip
解压zabbix_agents_2.4.0.win.zip
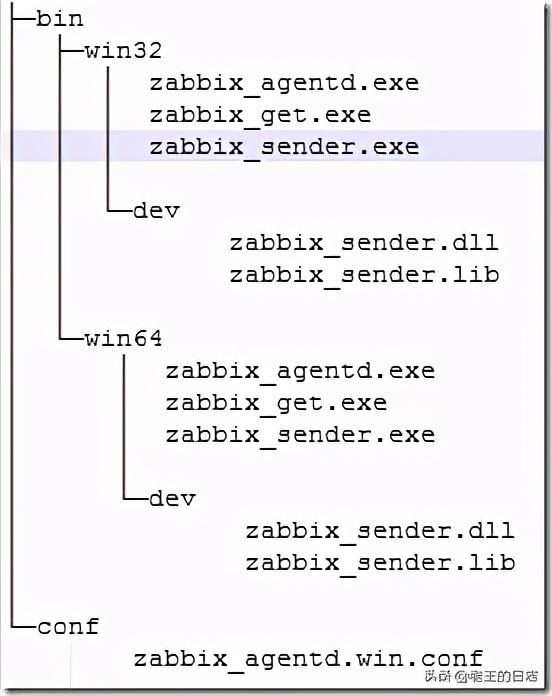
conf目录存放是agent配置文件
bin文件存放windows下32位和64位安装程序。
2、配置zabbix agent.win.conf
找到conf下的配置文件 zabbix_agentd.win.conf ,修改LogFile、Server、ServerActive 、Hostname这几个参数。具体配置如下:
LogFile=E:zabbixzabbix_agentd.logServer=172.17.22.155ServerActive=172.17.22.155Hostname=Windows_A参数说明:
Server: zabbix server的ip地址,
ServerActive: zabbix 主动监控server的ip地址,
其中Server和ServerActive都指定zabbix Server的IP地址,不同的是,前者是被动后者是主动。也就是说Server这个配置是用来允许172.17.22.155这个ip来我这取数据。而ServerActive的172.17.22.155的意思是,客户端主动提交数据给他。
Hostname 主机名,必须唯一,区分大小写。Hostname必须和zabbix web上配置得一直,否则zabbix主动监控无法正常工作。因为agent拿着这个主机名去问server,我有配置主动监控项吗?server拿着这个主机名去配置里面查询,然后返回信息。
zabbix agent检测分为主动(agent active)和被动(agent)两种形式,主动与被动的说法均是相对于agent来讨论的。
主动:agent请求server获取主动的监控项列表,并主动将监控项内需要检测的数据提交给server/proxy
被动:server向agent请求获取监控项的数据,agent返回数据。
3、安装agent
修改好文件后,用CMD(需有管理员权限)将Zabbix Agent安装为Windows系统的服务,在windows控制台下执行以下命令:
E:zabbixbinwin64zabbix_agentd.exe -i -c E:zabbixconfzabbix_agentd.win.conf控制台信息如下:
zabbix_agentd.exe [10540]: service [Zabbix Agent] installed successfullyzabbix_agentd.exe [10540]: event source [Zabbix Agent] installed successfully4、启动agent客户端
E:zabbixbinwin64>zabbix_agentd.exe -c E:zabbixconfzabbix_agentd.win.conf -s控制台信息
zabbix_agentd.exe [3176]: service [Zabbix Agent] started successfully
查看Windows端口使用
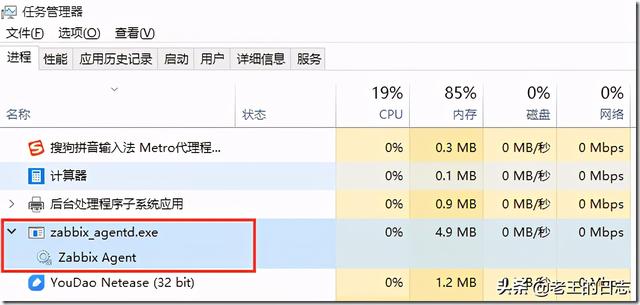
E:zabbixbinwin64>netstat -ano|findstr "10050"TCP 0.0.0.0:10050 0.0.0.0:0 LISTENING 10268TCP [::]:10050 [::]:0 LISTENING 10268E:zabbixbinwin64>tasklist|findstr "10268"zabbix_agentd.exe 10268 Services 0 6,944 K查看任务管理器
查看启动的日志zabbix_agentd.log:
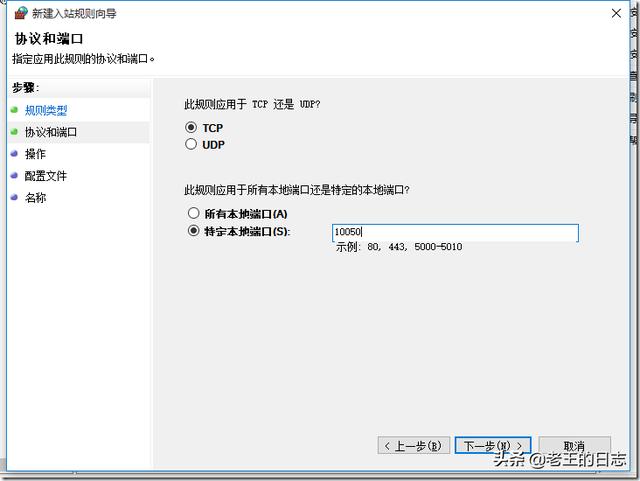
11036:20160114:102150.316 Starting Zabbix Agent [Windows host]. Zabbix 2.4.4 (revision 52334).11036:20160114:102150.317 using configuration file: E:zabbixconfzabbix_agentd.win.conf11036:20160114:102150.319 agent #0 started [main process]11040:20160114:102150.320 agent #1 started [collector]11024:20160114:102150.320 agent #4 started [listener #3]9112:20160114:102150.320 agent #3 started [listener #2]11108:20160114:102150.320 agent #3 started [listener #2]11028:20160114:102150.320 agent #5 started [active checks #1]11028:20160114:102150.328 no active checks on server [172.17.22.155:10051]: host [Windows host] not found5、windows系统防火墙中开放端口10050
控制面板--à选择windows 防火墙--à高级设置--à设置入站规则--à新建规则
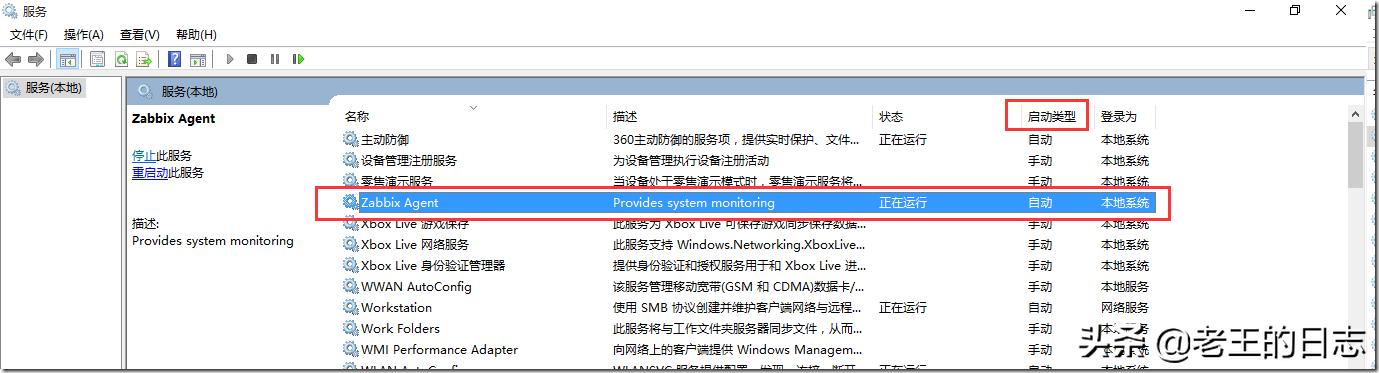
6、设置开机启动
运行services.msc
7、zabbix_agentd.exe命令说明
-c 制定配置文件所在位置
-i 安装客户端
-s 启动客户端
-x 停止客户端
-d 卸载客户端
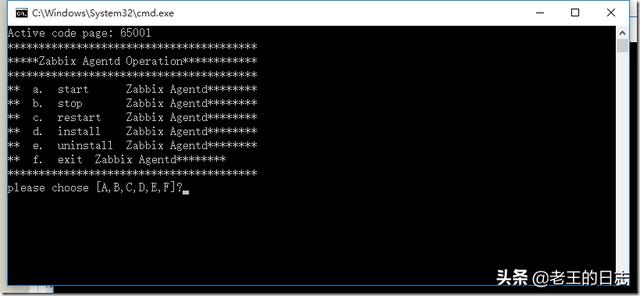
8、批处理脚本agentd.bat
下面为Windows批处理脚本agentd.bat对客户端服务器上的zabbix_agentd进行安装、启动、停止、卸载。
前提:
1、解压zabbix_agents_2.4.4.win.zip到c:zabbix目录
2、修改了参数文件c:zabbixconfzabbix_agentd.win.conf
脚本内容如下:
@echo offCHCP 65001echo ****************************************echo *****Zabbix Agentd Operation************echo ****************************************echo ** a. start Zabbix Agentd********echo ** b. stop Zabbix Agentd********echo ** c. restart Zabbix Agentd********echo ** d. install Zabbix Agentd********echo ** e. uninstall Zabbix Agentd********echo ** f. exit Zabbix Agentd********echo ****************************************:loopchoice /c abcdef /M "please choose"if errorlevel 6 goto :exit if errorlevel 5 goto uninstallif errorlevel 4 goto installif errorlevel 3 goto restartif errorlevel 2 goto stopif errorlevel 1 goto start:startc:zabbixbinwin64zabbix_agentd.exe -c c:zabbixconfzabbix_agentd.win.conf -sgoto loop:stopc:zabbixbinwin64zabbix_agentd.exe -c c:zabbixconfzabbix_agentd.win.conf -xgoto loop:restartc:zabbixbinwin64zabbix_agentd.exe -c c:zabbixconfzabbix_agentd.win.conf -xc:zabbixbinwin64zabbix_agentd.exe -c c:zabbixconfzabbix_agentd.win.conf -sgoto loop:installc:zabbixbinwin64zabbix_agentd.exe -c c:zabbixconfzabbix_agentd.win.conf -igoto loop:uninstallc:zabbixbinwin64zabbix_agentd.exe -c c:zabbixconfzabbix_agentd.win.conf -dgoto loop:exitexit9、创建主机,查看监控效果
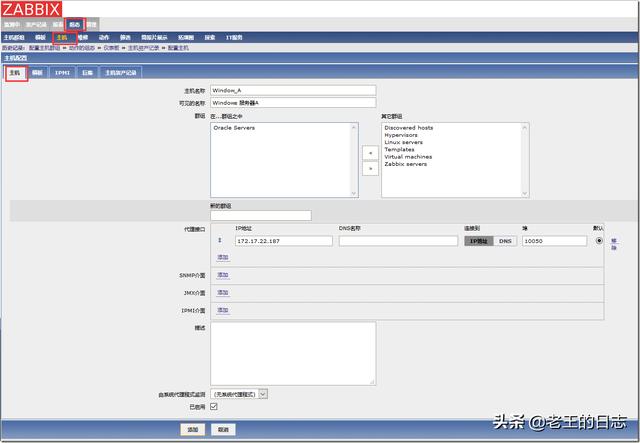
configuration(组态,配置)–>Hosts(主机)–>Create host(创建主机)
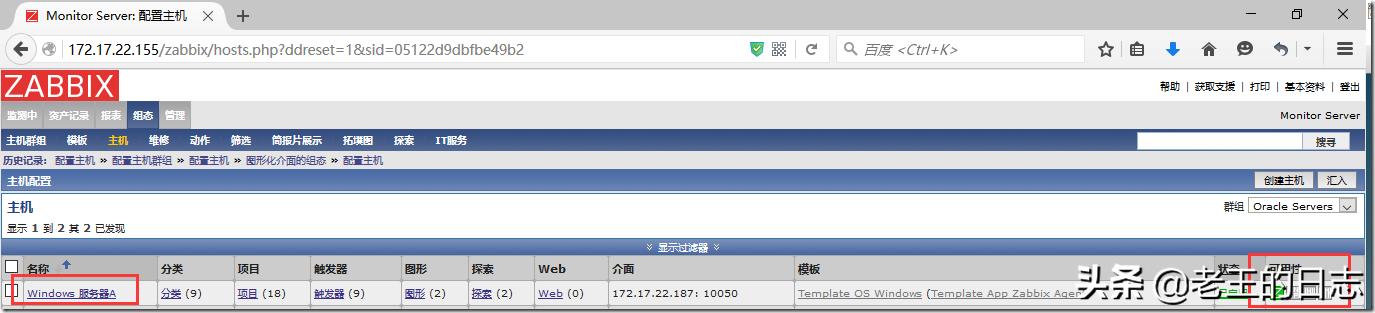
连接模板

查看结果
10、安装中遇到的问题
如果未开放10050端口,查看主机监控状态,则结果如下
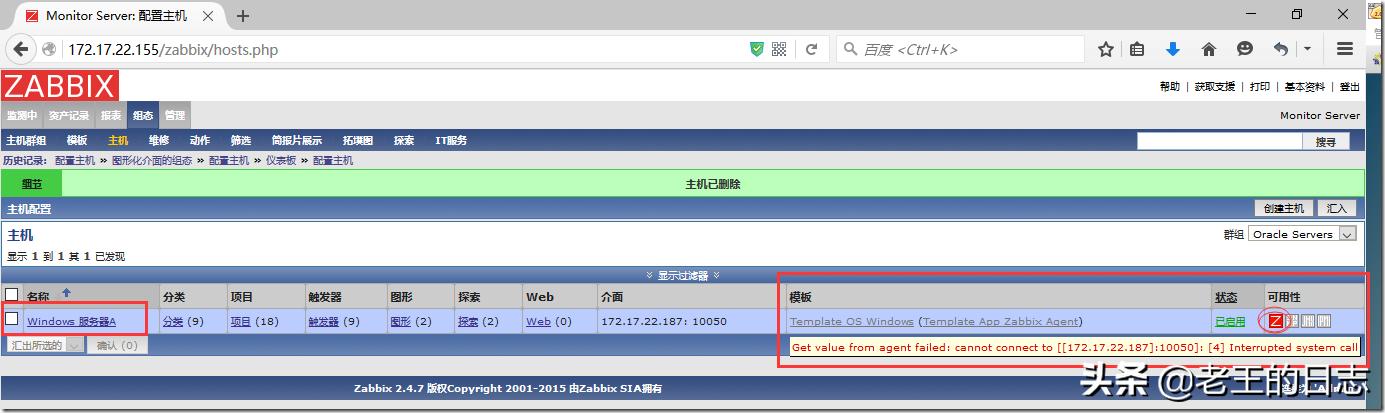
后台日志
2924:20160114:103211.044 cannot send list of active checks to [172.17.22.187]: host [Windows host] not found,原因是被监控的window系统防火墙未开放10050端口

电影级数字人,免显卡端渲染SDK,十行代码即可调用,工业级demo免费开源下载!
更多推荐


 0
0 0
0- 0


 已为社区贡献1条内容

所有评论(0)