
Python-Django项目部署Windows IIS上面和static文件配置
Python-Django项目部署Windows IIS上面和static文件配置
·
一、前提条件:已经存在一个可以运行的Django项目
1、查看虚拟环境并激活,运行项目验证是否可以启动:
(1)查看虚拟环境
conda env list
(2)激活虚拟环境
activate C:\xxxxxxxx\AmuHosMag
(3)启动项目
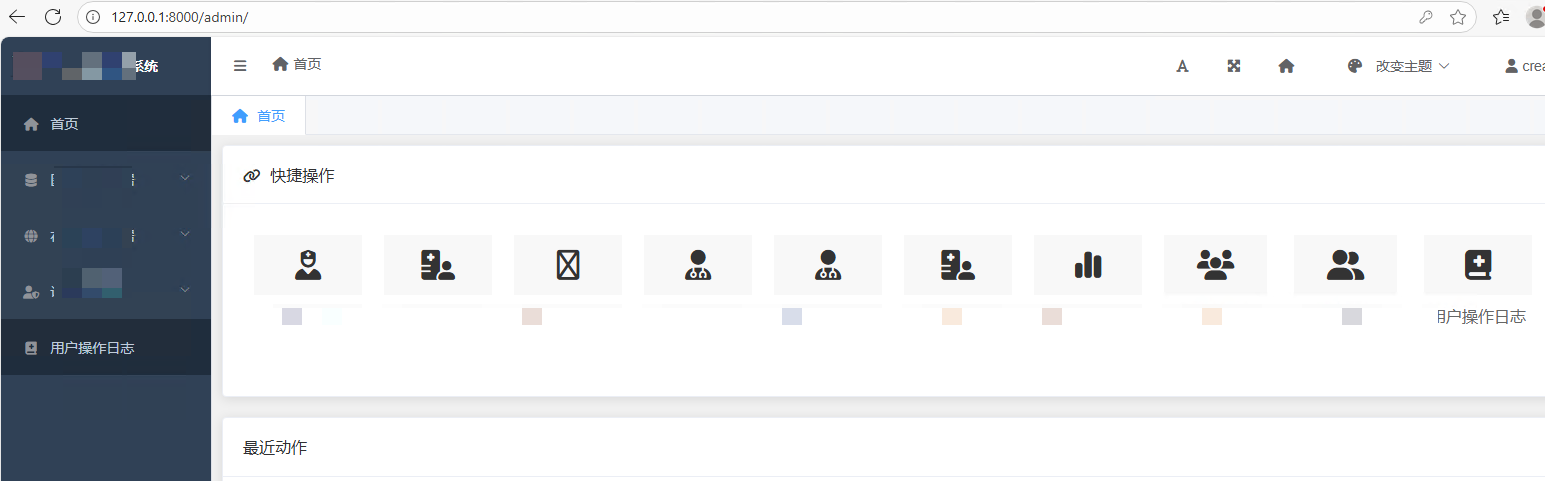
python manage.py runserver

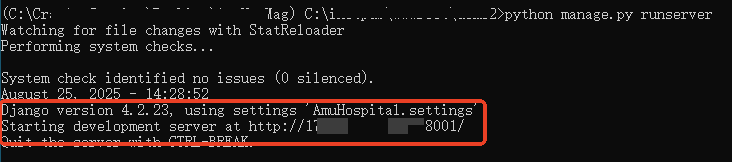
2、还可以指定项目启动的地址和端口:
(1)在项目里面的manage.py文件里面添加以下内容(其中部分内容根据自己的实际情况调整)
from django.core.management.commands.runserver import Command as Runserver   #引入相关的包
Runserver.default_addr = 'xxxxxxx'             # 修改默认地址
Runserver.default_port = 'xxxxx'               # 修改默认端口

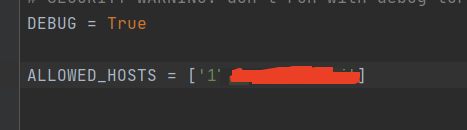
(2)修改项目里面的settings.py文件:
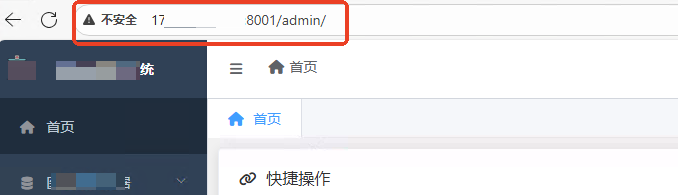
将ALLOWED_HOSTS = [ ] 修改为 ALLOWED_HOSTS = ['xxxxxx'] ,其中 xxxxxx为启动的地址 或者
将ALLOWED_HOSTS = [ ] 修改为 ALLOWED_HOSTS = ['*'],表示可以允许所有地址访问
 ```c
```c
(3)启动项目
二、windows系统安装IIS功能
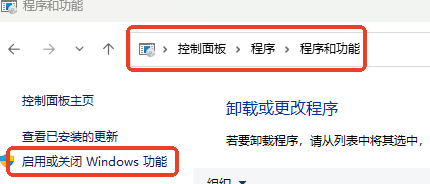
1、找到并打开:控制面板—程序—程序与功能—启用或关闭Windows功能:
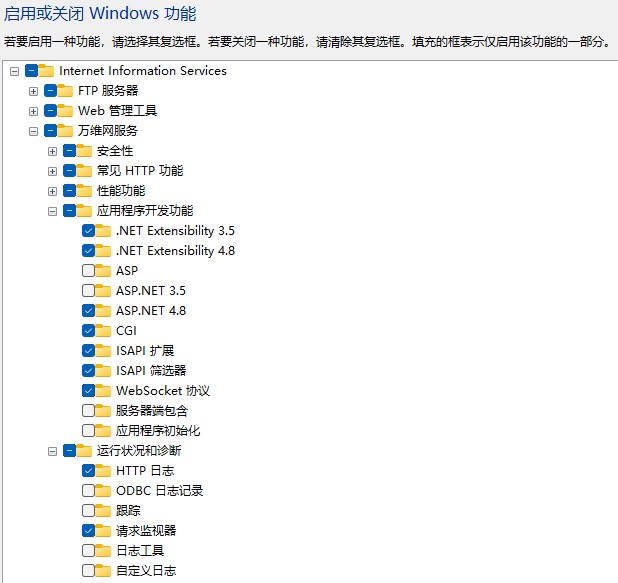
2、按照下图来勾选功能,然后点击确定进行安装:
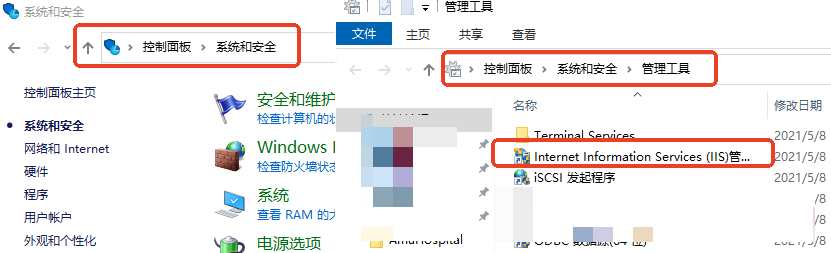
3、安装完后重启一下系统,打开IIS管理器:控制面板—系统和安全—管理工具
三、IIS管理器中部署Django项目
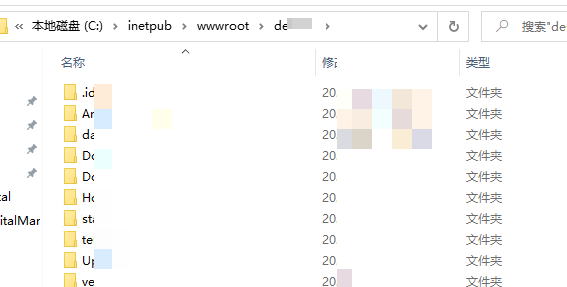
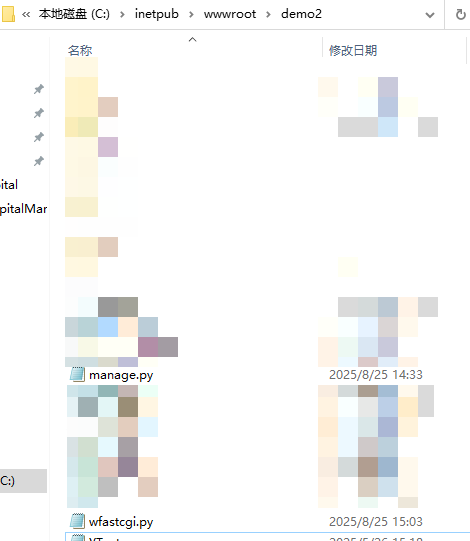
1、找到C:\inetpub\wwwroot路径,在里面新建一个文件夹并将django项目移动到新建文件夹里面:
2、安载并启用wfastcgi:
pip install wfastcgi
wfastcgi-enable
输出python运行环境和wfastcgi.py文件所在路径,这两个将在后面会使用到!
3、将wfastcgi.py文件复制到前面新建的项目文件夹里面:
4、在新建的项目目录下创建文件web.config,内容如下:
主要修改(1)scriptProcessor:修改为项目的python运行环境和wfastcgi.py文件所在路径
(2)PYTHONPATH:修改为新建项目文件夹路径
(3)DJANGO_SETTINGS_MODULE:修改为新建项目下的settings.py引用
(4)WSGI_LOG:根据自己实际情况新建(可有可无)
<?xml version="1.0" encoding="UTF-8"?>
    <configuration>
        <system.webServer>
            <handlers>
                <add name="Python FastCGI" path="*" verb="*" modules="FastCgiModule" scriptProcessor="c:\Users\ss\AppData\Local\Programs\Python\Python37\python.exe|c:\inetpub\wwwroot\demo\wfastcgi.py" resourceType="Unspecified" requireAccess="Script" />
            </handlers>
        </system.webServer>
        <appSettings>
            <add key="WSGI_HANDLER" value="django.core.wsgi.get_wsgi_application()" />
            <add key="PYTHONPATH" value="C:\inetpub\wwwroot\demo" />
            <add key="DJANGO_SETTINGS_MODULE" value="myFirWeb.settings" />
            <add key="WSGI_LOG" value="C:\inetpub\wwwroot\demo\error.log" />
        </appSettings>
    </configuration>
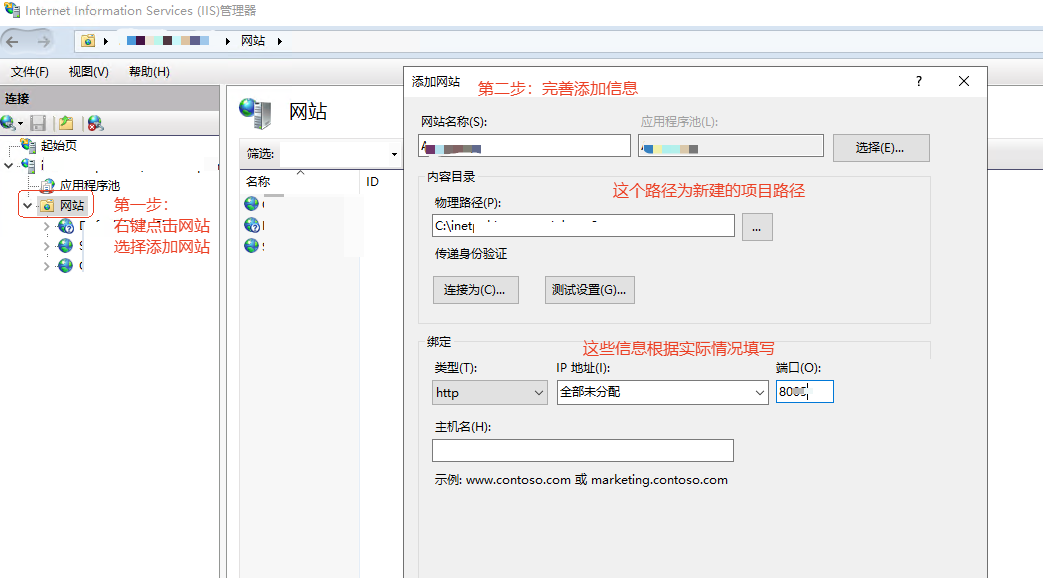
5、在IIS里面添加网站,填写信息:
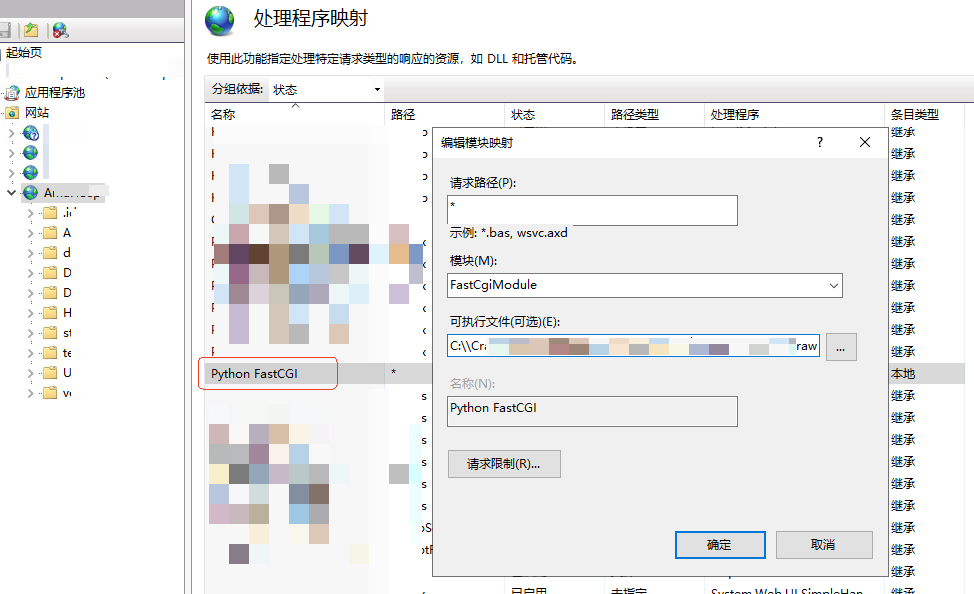
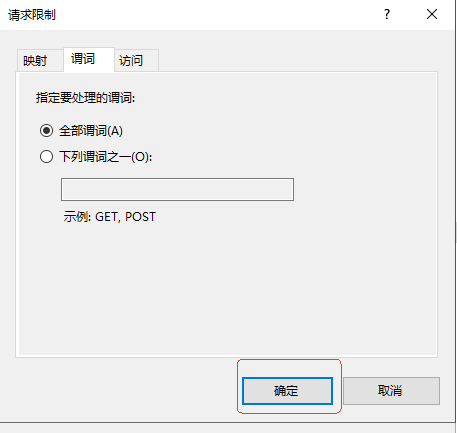
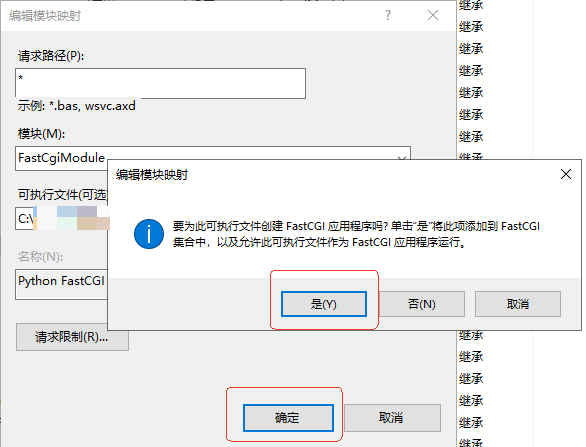
6、启动fastcgi程序:创建完成后,点击网站名称,找到处理程序映射,右键点击打开,找到Python FastCGI选项,双击进入,检查一下和web.config文件对应不,然后点击请求限制,不做操作,就依次确认
7、修改进程标识:
双击应用程序池,点击一下刚刚建立的网站,再点击右侧高级设置,修改进程标识为localsystem
然后再重启网站,浏览器输入网址http://127.0.0.1:8005/,就可以正常访问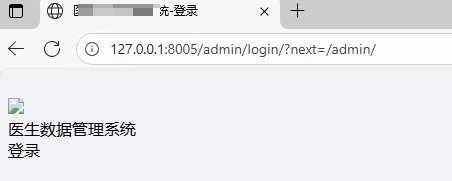
访问确实没有问题了,但是样式无法正常显示,于是需要进行下面的第四步调整
四、static文件设置和正确显示
1、调整项目下settings.py里面的内容:
将STATICFILES_DIRS = (os.path.join(BASE_DIR, "static"),)修改成以下:

STATIC_URL = '/static/'
STATIC_ROOT= os.path.join(BASE_DIR, 'static')
然后命令行窗口输入 > python manage.py collectstatic 选择yes覆盖
2、在static目录下创建文件web.config文件:
<?xml version="1.0" encoding="UTF-8"?>
    <configuration>
        <system.webServer>
            <handlers>
            	<remove name="Python FastCGI" />
            </handlers>
        </system.webServer>
    </configuration>
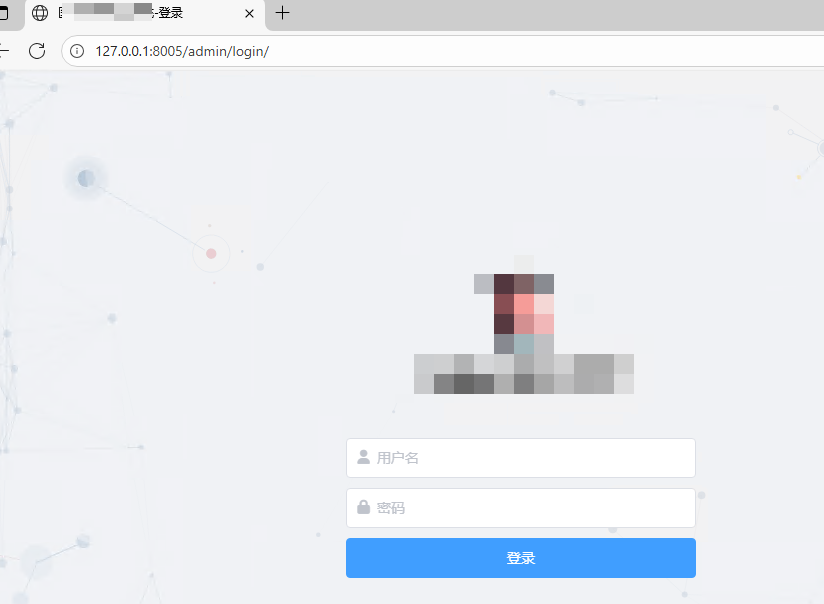
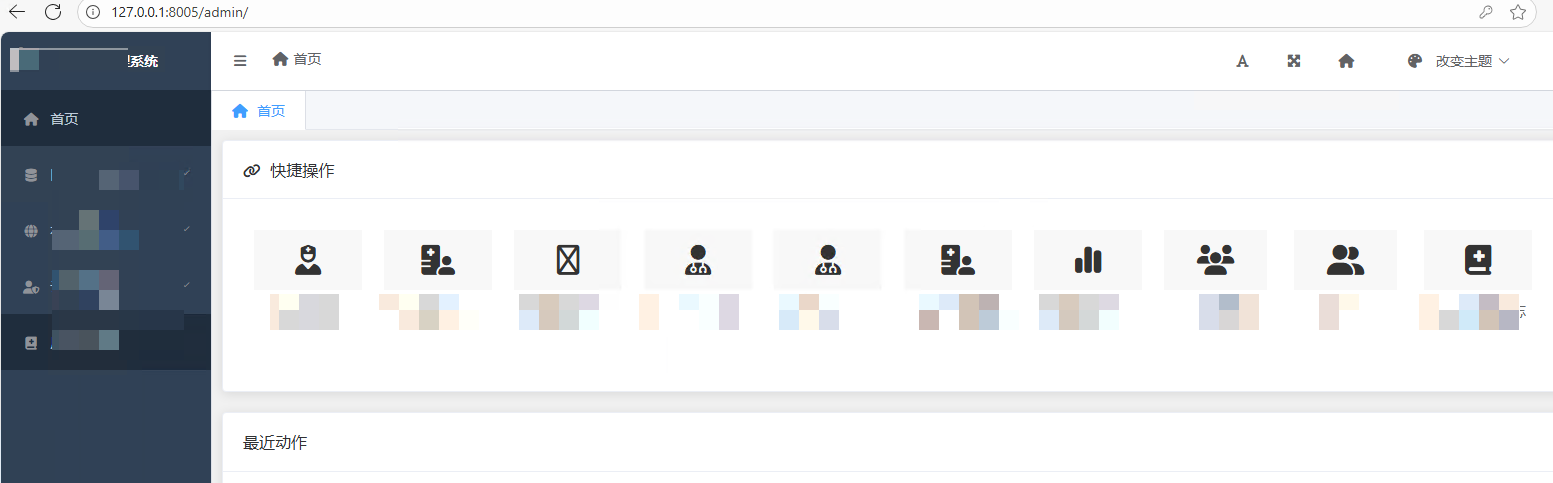
3、再次在网页上输入地址就可以进行正常访问:
注意事项:部署在windows IIS上面的Django项目,一定要创建独立的虚拟环境来运行项目,不能使用Anaconda的base环境,否则将会报错,如下所示:
Error occurred while reading WSGI handler:

Traceback (most recent call last):
  File "C:\inetpub\wwwroot\demo1\wfastcgi.py", line 791, in main
    env, handler = read_wsgi_handler(response.physical_path)
  File "C:\inetpub\wwwroot\demo1\wfastcgi.py", line 633, in read_wsgi_handler
    handler = get_wsgi_handler(os.getenv("WSGI_HANDLER"))
  File "C:\inetpub\wwwroot\demo1\wfastcgi.py", line 600, in get_wsgi_handler
    handler = __import__(module_name, fromlist=[name_list[0][0]])
  File ".\CrawlHospitalManage\wsgi.py", line 16, in <module>
    application = get_wsgi_application()
  File "D:\Anaconda2022\install\lib\site-packages\django\core\wsgi.py", line 12, in get_wsgi_application
    django.setup(set_prefix=False)
  File "D:\Anaconda2022\install\lib\site-packages\django\__init__.py", line 24, in setup
    apps.populate(settings.INSTALLED_APPS)
  File "D:\Anaconda2022\install\lib\site-packages\django\apps\registry.py", line 83, in populate
    raise RuntimeError("populate() isn't reentrant")
RuntimeError: populate() isn't reentrant


StdOut:

StdErr: D:\Anaconda2022\install\lib\site-packages\numpy\__init__.py:138: UserWarning: mkl-service package failed to import, therefore Intel(R) MKL initialization ensuring its correct out-of-the box operation under condition when Gnu OpenMP had already been loaded by Python process is not assured. Please install mkl-service package, see http://github.com/IntelPython/mkl-service
  from . import _distributor_init

电影级数字人,免显卡端渲染SDK,十行代码即可调用,工业级demo免费开源下载!
更多推荐
 24
24 0
0- 0


 已为社区贡献1条内容

所有评论(0)